Staticman at Heroku
Staticman is a small web service that handles a POST request from your comment form, runs various validations and pushes the resulting comment file to your repository.
Configure and deploy an instance of Staticman at Heroku.
- Jekyll site hosted at GitHub using Staticman v2
- reCaptcha v2 for spam reduction
- MailGun, a free mailing list service for Notifications
- Comments are moderated
Contents
- Create a GitHub bot account
- Generate a personal access token for the bot
- Site configuration files
- Set up a Heroku account
- Deploy Staticman API bridge to Heroku
- Encryption overview
- Generate an RSA key
- Send configuration variables to Heroku
- Invite the bot to become a collaborator
- Set up reCaptcha v2
- Set up MailGun
- fromAddress
- Webhook
- Try it out
-
- Troubleshooting
- Credits
- Appendix — MD5 questions
- Appendix — Exercising MailGun
- Playground
- Appendix — Fighting spam
This is mostly an Installation Guide and partly a Theory of Operation. Corrections and clarifications are very much welcomed.
This guide does not cover the _include files for implementing commenting on your Jekyll site. See my _includes/comments* and the credits at the end.
Create a GitHub bot account
Create a new account at GitHub to act as your Staticman robot for handling comments. This is just an ordinary user account. It will ask you for a unique email address. My bot is named willymcallisterbot. My bot’s email address is,
willymcallister1+staticmanbot@gmail.com
Here’s a trick if you have gmail: You can make an unlimited number of new email accounts by appending + after your gmail username, and then any string. For example, if willymcallister1@gmail.com is your email then willymcallister1+staticmanbot@gmail.com counts as a totally different email as far as github is concerned.
The bot account doesn’t have any repositories. It just has a personal access token used by the Staticman app at Heroku, which does all the work.
Generate a personal access token for the bot
Request a personal access token from GitHub for the bot account. This acts as a password when Staticman API bridge at Heroku sends Pull Requests (moderated) or Pushes (not moderated) to your GitHub web site repository.
- Log in to GitHub as your bot,
willymcallister1+staticmanbot@gmail.com. - Go to Settings (upper right).
- Developer Settings: Personal Access Tokens.
- Request a token.
- Set scope to: repo, user (or all of them).
- A personal access token looks something like,
8a47c7blahblahblahblahblahblahblahf3f70c. - Write it down somewhere local. We send this to Heroku a few steps farther down.
Do not mention a valid personal access token in a file on GitHub. If you do, GitHub will recognize it and invalidate it. You have to go back and create a new one and send it to Heroku.
Site configuration files
The goal right now is to get the Staticman API bridge up and running at Heroku so we can get access to Staticman’s /encrypt/ endpoint. That allows us to encrypt strings needed by reCaptcha and MailGun. (We do that encryption using the RSA key we generate in a an upcoming step.)
For the moment, your preliminary _config.yml and staticman.yml don’t need reCaptcha or MailGun strings. If you have these entries, leave them alone or comment them out. We’ll replace them after the Staticman API bridge is up.
- Set up preliminary _config.yml and staticman.yml without encrypted info.
- Deploy the Staticman API bridge at Heroku.
- Gather various key strings.
- Encrypt with calls to Staticman’s /encrypt endpoint.
- Update _config.yml and staticman.yml.
_config.yml
Pick a unique name to give your Staticman API bridge at Heroku. Then assemble staticmanUrl,
General form,
https://${bridge_app_name}.herokuapp.com/v2/entry/${github-username}/${blog-repo}/master/comments
My version of staticmanUrl,
https://spinningnumbers-staticman2.herokuapp.com/v2/entry/willymcallister/willymcallister.github.io/master/comments
(My site is served from the master branch. If yours is not, change it to your repository, like gh-pages.)
Add the staticmanUrl to _config.yml,
staticmanUrl: https://spinningnumbers-staticmandev2.herokuapp.com/v2/entry/willymcallister/willymcallister.github.io/master/comments
A bit later we will come back to _config.yml and staticman.yml and add the reCaptcha siteKey and an encrypted reCaptcha secret key.
What’s happening: staticmanUrl gets built into every comment_form on your site. When someone submits a comment the web server at GitHub submits the comment form to staticmanUrl as a POST. This wakes up the Staticman API bridge at Heroku. Staticman puts together the comment file (the files you see under _data/comments) and sends it to your site’s GitHub repository as a Pull Request (if comments are moderated) or pushed directly to the main branch (if comments are not moderated).
staticman.yml
Create your own staticman.yml starting from a sample staticman.yml from Staticman’s GitHub repository, or from mine, or from Travis. Modify as appropriate and save in the top level of your site.
For each comment request, the Staticman API bridge at Heroku fetches staticman.yml from GitHub. Information in staticman.yml, plus some configuration variables we are going to set directly at Heroku, guides the actions of the Staticman API bridge.
This is a preliminary staticman.yml. We will come back to add/update the reCaptcha and MailGun entries later, after the encrypt/ endpoint becomes available from the Staticman API bridge at Heroku.
Set up a Heroku account
Set up a free account at Heroku.
I recommend you install the Heroku command line interface (CLI) on your computer. When you log in to the Heroku CLI on your computer you can issue various heroku commands in a terminal window.
Deploy Staticman API bridge to Heroku

Visit Staticman at github. Switch to the desired branch—either master or dev. I am using the dev branch.

Click Deploy to deploy the Staticman API bridge to Heroku. Follow the instructions.
For example, I named my Staticman API bridge at Heroku spinningnumbers-staticmandev2.
https://git.heroku.com/spinningnumbers-staticmandev2.git
The Staticman API bridge provides various endpoints: /entry/, /encrypt/, /connect/, /auth/.
Encryption overview
What accounts are involved?
- GitHub repository (open access)
- reCaptcha (password protected)
- MailGun (password protected)
- Heroku (password protected)
What needs to be protected?
- reCaptcha secret key (in _config.yml, staticman.yml, and every post with a comment form).
- MailGun API key (in staticman.yml).
- MailGun domain (in staticman.yml).
- Subscriber email addresses stored at GitHub.
What are these used for?
- Encrypted reCaptcha secret key is passed to Staticman when Submit is clicked. Staticman decrypts it to cleartext and uses it to perform the reCaptcha test.
- Encrypted MailGun API key is passed to Staticman via staticman.yml and decrypted by Staticman. The cleartext API key is uses as a password to send requests to MailGun. This prevents bad guys from accessing your MailGun account to send mail or grab your mailing lists.
- Encrypted MailGun domain is passed to Staticman via staticman.yml and decrypted by Staticman. This protects your specific MailGun domain from being known by bad guys to make it harder to send to your mailing lists. (I’m weakening this protection by mentioning my MailGun domain in this article.)
- Subscriber email addresses are saved as cleartext at MailGun but get obfuscated in comment files sent to GitHub.
What does the protecting?
- An RSA key pair you generate yourself and deliver to Staticman API bridge at Heroku. Used to encrypt secrets for reCaptcha and MailGun.
- An MD5 hash algorithm performed by Staticman. MD5 obfuscates subscriber email addresses and is also used to generate mailing list names.
RSA
Staticman performs encryption/decryption with a strong RSA key (Rivest Shamir Adleman). This is one of the first public-key cryptosystems. It uses a pair of keys, public and private. The public key is used for encryption. You keep the decryption key private, away from prying eyes. You generate a key-pair with a ssh-keygen command as shown in the RSA section. SSH (Secure Shell) is a software package that enables file transfers over insecure networks.
When you set up your Staticman API bridge at Heroku one of its configuration variables is the RSA_PRIVATE_KEY. The long character string contains both the public and private RSA keys. Staticman provides an /encrypt/ endpoint as a convenient service for you to encrypt the things you want to protect, using your RSA public key. Later on, when encrypted information arrives at Staticman, it decrypts with the private key to recover cleartext versions of your reCaptcha and MailGun values.
MD5
Staticman uses a second algorithm called MD5 (specified in staticman.yml). MD5 is a hash algorithm that takes in an arbitrary text string and produces a 128-bit string.
MD5 serves two purposes,
- Commenter’s email addresses are saved in comment.yml files at GitHub. The email addresses are MD5-encoded to keep them away from prying eyes. MD5 is not a strong cryptosystem and can be broken with modest effort, but it hides email addresses from someone snooping through your repository.
- Staticman also uses MD5 to generate a compact name for the mailing list (the alias) associated with each post. MD5 produces an arbitrary compact name based on your name, repository name, and entryID. With MD5 it is very unlikely two mailing lists will accidentally have the same name.
Generate an RSA key
Generate an RSA key pair,
ssh-keygen -m PEM -t rsa -b 4096 -C "staticman key" -f ~/.ssh/staticman_key
This produces two files on your computer in folder ~/.ssh,
- staticman_key
- staticman_key.pub
staticman_key is the private key,
-----BEGIN RSA PRIVATE KEY-----
49 lines with linefeeds, like this,
5BuCDTs1vxgXJGldwLErMbYb3Ol5U0TbjEiShOQGMYV5ShmyCY4wYYLOdlJ5VNd3
goopgoopgoopgoopgoopgoopgoopgo/mhRTnEpRt1r5rDlU7Y2o55pxNkJQf72WP
vskphtdXmXWExKdHasdfasdfasdfasdfasdfasdfvsMys16teXIEr3VfNITRu93c
fSDT/H2g34m5746T4cS6BHYeWBGjuTu2XJXVxCQwFZfa6qgHZOhzD2iv76C88VC7
V2Rmk027o3dNLxmnlp85ml9BmwbtCPPESaKl5U2v4pTChXkXCgNhgc4Il4pY1fOj
... etc
-----END RSA PRIVATE KEY-----
The private key file, staticman_key, contains both private and public keys. Protect this file from prying eyes. Do not save it in your GitHub repository. Do not mail it to anyone. Only place it in private places with password protection.
The file with the .pub extension, staticman_key.pub, is just the public key,
ssh-rsa blahblahblahblaoneverylonglinethatgoesonandonandonandon willymcallister@Willy2-MPB.local
The .pub key by itself isn’t used in this Staticman setup. Nothing needs to know only the public key—Staticman is the only consumer. We give it both parts of the key in the next step.
Send configuration variables to Heroku
In a terminal window issue these Heroku commands to set configuration variables. Don’t forget the double quote marks around each configuration variable name and value.
Send the unencrypted (cleartext) staticman_key to Heroku, (with \n newlines removed),
heroku config:add --app yourAppName "RSA_PRIVATE_KEY=$(cat ~/.ssh/staticman_key | tr -d '\n')"
Send the robot’s GitHub personal access token,
heroku config:add --app yourAppName "GITHUB_TOKEN=8a47c7blahblahblahblahblahblahblahf3f70c"
Check that the configuration variables are set,
heroku config --app yourAppName
Go to Heroku’s web site. Click on Open App in the upper right. The response should be,
$\text{Hello from Staticman version 3.0.0!}$
That’s what a successful deployment looks like.
What’s happening:
RSA_PRIVATE_KEY - When you send a string to Staticman’s /encrypt/ endpoint it will use the enclosed public key to perform the encryption, and the enclosed private key for decryption. If you ever modify this RSA key you have to do all the encryptions over again and update _config.yml and staticman.yml.
The personal access token acts as a password when the Staticman sends a Pull Request or Push to your site. It allows the Staticman API bridge to present itself as the bot, your approved collaborator. Protect your bot’s personal access token like a password.
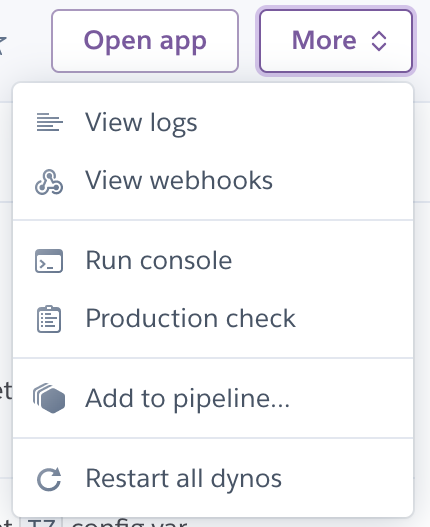
Heroku logs are in the More menu on the Heroku web site.
Invite the bot to become a collaborator
- Log in to GitHub as yourself. Go to to your site repository.
- Go to Settings: Manage Access.
- Search for your GitHub bot account (willymcallisterbot) and add it as a collaborator.
- Click Invite a collaborator. An invitation is sent to the bot.
There are three ways to accept the invitation, pick one,
Log in to GitHub as the bot, willymcallister1+staticmanbot@gmail.com. Click on Accept Invitation.
Or, accept the invitation by opening the email sent to the bot by GitHub and following the link.
Or, use the method from back when Staticman was a public service:
Put this URL into a browser,
https://api.staticman.net/v2/connect/{your GitHub username}/{your repository name}
This should return OK! (one time) if it worked.
What’s happening:
This allows the bot to modify your site. We will tell the Staticman API bridge your bot’s Personal Access Token, so it can send things to your site repository, too.
Set up reCaptcha v2
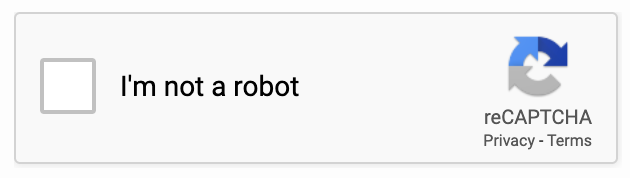
Go to reCAPTCHA and sign up your web site. I use the “v2 Checkbox” variant.
When you sign up you get two 40-character reCaptcha keys, site and secret.
reCaptcha site key
siteKey: "recaptcha40CharactersiteKeyblahblahblahb"
Add the cleartext siteKey to _config.yml and staticman.yml.
Encrypt the reCaptcha secret key
Unencrypted secret: recapcha40charactersecretKeyasdf12345xx0
Encrypt the reCaptcha SECRET key (not the siteKey) using the Staticman API bridge /encrypt/ endpoint. To encrypt, assemble the following URL and put it into a browser,
General form,
https://${bridge_app_name}.herokuapp.com/v2/encrypt/{$recaptcha-secret}
My form,
https://yourAppName.herokuapp.com/v2/encrypt/recapcha40charactersecretKeyasdf12345xx0
The encrypted reCaptcha secret key appears in the browser as a single long line. Enclose the string in double quotes and add secret: in front. Add this line to both _config.yml and staticman.yml.
What’s happening:
The encrypted reCaptcha secret key is sent with each new comment to Staticman API bridge. Staticman decrypts what it received to recover the cleartext reCaptcha secret key. It uses the cleartext reCaptcha secret key to verify the reCaptcha process was done properly.Question: What is the siteKey used for?
Set up MailGun
Sign up for a MailGun account. It is free until you exceed 10,000 emails per month. As part of the process you are issued some API keys,
- Private API key — this is the one we use, treat it like a password
- Public validation key — not used
- HTTP webhook signing key — not used
A MailGun Private API key: key-mailgunprivateAPIkey1234asdf1234
A MailGun public validation key: pubkey-willyspublicvalidationkey1234asd
Tell your ISP about MailGun: You have to add some MX entries to your domain records where your domain is hosted.
Encrypt the Mailgun Private API key
Use Staticman’s /encrypt/ endpoint to encrypt your MailGun private API key. Assemble this URL and put it into a browser,
General form,
https://${bridge_app_name}.herokuapp.com/v2/encrypt/{$mailgun-private-API-key}
My form,
https://yourAppName.herokuapp.com/v2/encrypt/key-mailgunprivateAPIkey1234asdf1234
Returns the encrypted MailGun Private API key as a big long line. Enclose the string in double quotes and add apiKey: in front. Add this line to staticman.yml.
Encrypt the MailGun domain
General form,
https://${bridge_app_name}.herokuapp.com/v2/encrypt/{$mailgun-domain}
My MailGun domain is mg.spinningnumbers.org, (not spinningnumbers.org),
https://yourAppName.herokuapp.com/v2/encrypt/mg.spinningnumbers.org
Returns the encrypted MailGun domain on a single long line. Enclose this string in double quotes. Add domain: in front. Add to staticman.yml.
Test Mailgun
Here are several commands you can enter into a terminal window to test your MailGun setup. curl (“client URL”) is a command for composing and sending URL’s.
Send mail to an individual, general form,
curl -s --user 'api:YOUR_SECRET_API_KEY' \
    https://api.mailgun.net/v3/YOUR_DOMAIN_NAME/messages \
    -F from='Excited User <mailgun@YOUR_DOMAIN_NAME>' \
    -F to=YOU@YOUR_DOMAIN_NAME \
    -F to=bar@example.com \
    -F subject='Hello' \
    -F text='Testing some Mailgun awesomness!'
My command sent to an individual,
curl -s --user 'api:key-willysprivateAPIkey1234asdf1234a' \
    https://api.mailgun.net/v3/mg.spinningnumbers.org/messages \
    -F from='Chief Explainer <willy@spinningnumbers.org>' \
    -F to=willymcallister1@gmail.com \
    -F subject='Hello' \
    -F text='Testing a Mailgun feature! Sent directly to willymcallister1@gmail.com'
An email shows up in my inbox. Be patient, it may take 5–10 minutes for it to appear.
Send mail to a mailing list. This sends an email to one of the mailing lists for my site in my MailGun account,
curl -s --user 'api:key-willysprivateAPIkey1234asdf1234a' \
    https://api.mailgun.net/v3/mg.spinningnumbers.org/messages \
    -F from='Chief Explainer <willy@spinningnumbers.org>' \
    -F to='71f192f4bf9d9be35a7c1991d9b56459@mg.spinningnumbers.org' \
    -F subject='Hello' \
    -F text='Testing a Mailgun mailing list.'
It took about 5–10 minutes for the message to show up. (You can’t send to this mailing list because I didn’t tell you my MailGun api key.)
fromAddress
Usually email notifications announcing new comments come from Staticman(noreply@staticman.net). You can change this email address with the notifications.fromAddress variable. For the longest time I thought this was supposed to go in my staticman.yml file, but I got this error message,
Warning: configuration param ‘notifications.fromAddress’ not declared in the schema
I finally realized: The Staticman Bridge API server at Heroku gets this configuration variable from the environment variables you give it. To change the from address you to set the EMAIL_FROM configuration variable.
heroku config:add --app yourAppName "EMAIL_FROM=willy@spinningnumbers.org"
Check that the variable got set,
heroku config --app yourAppName
If you roll your own Staticman server or deploy to Heroku manually (without using the Deploy button) there is a second configuration file associated with the Staticman server called config.*.json. Copy config.test.json or config.sample.json to config.production.json. Then add this line,
“email”: { “fromAddress”: “noreply@mg.gabescode.com” }
Gabe tells you more about how to do this.
Notification emails from Staticman will have your email address.
Webhook
A webhook is a way for two web programs to communicate via a URL.
This is an important step if you have moderation enabled, (notifications: enabled: true). Email notifications will not be sent if moderation is enabled and you have not set up this webhook. Staticman implements a webhook. You add its URL to your site repository at GitHub in the Settings menu.
The original webhook for the Staticman public instance,
https://api.staticman.net/v1/webhook
My version, (yes, v1),
https://yourAppName.herokuapp.com/v1/webhook
GitHub triggers the webhook when the moderator approves a comment (merges the Pull Request). GitHub sends the webhook URL to Staticman along with a POST containing a bucket load of information about the Pull Request.
Staticman does two things when the webhook arrives,
- Sends an email notification to the proper mailing list at MailGun.
- Sends a command to GitHub to delete the branch that was created for the Pull Request. This keeps PR’s from piling up.
Here are Staticman’s instructions for setting up the webhook on your GitHub repository, repeated below. Gabe talks more out it here.
Set up the webhook
- Go to the Settings page of your GitHub repository, select Webhooks.
-
Click Add Webhook and use the following options,
- Payload URL: https://yourAppName.herokuapp.com/v1/webhook/
- Content type: application/json
- Secret: (empty)
- Which events would you like to trigger this webhook?
- Let me select individual events
- Select the “Pull request” event
- (I deselected “Push”)
- Active: Checked.
Try it out
Get ready to view your log on the Heroku site (MORE: View logs), or download the log with,
heroku logs --app yourAppName Show last 100 lines of log.
heroku logs --num 200 --app yourAppName Show last 200 lines of log.
heroku logs --tail --app yourAppName Show tail of log, with live update. Ctrl+C to return to the prompt.
Submit a comment. Watch the Heroku log to see what happens. You are hoping for a status=200. This is what a successful log entry looks like,
2020-03-27T02:12:13.110055+00:00 heroku[router]: at=info method=POST path=”/v2/entry/willymcallister/willymcallister.github.io/master/comments” host=spinningnumbers-staticmandev2.herokuapp.com request_id=ad4baa2a-e188-40ea-9471-1f146df5a297 fwd=”70.187.193.116” dyno=web.1 connect=0ms service=3572ms status=200 bytes=536 protocol=https
Also look for errors in your browser’s inspector on your post’s page. Open the inspector near the comment form and look for errors. Open any underlying objects to see what Staticman/Heroku sent back when the comment_form was submitted.
Note: Heroku logs are always shown in UTC time, +00:00. (Coordinated Universal Time, or GMT)
Akismet - UNDER CONSTRUCTION
This section is incomplete. I have not gotten Akismet to work. Still have questions.
Akismet is an optional spam detection service from Wordpress. Enable Akismet for spam detection in addition to reCaptcha.
Sign up for an Akismet account. You get an API key as part of your Akismet account. You will also set up a Wordpress account. The Wordpress account is where you specify the website URL being protected. Typical setting: https://yourdomain.com.
Tell Staticman to use Akismet by adding these lines to staticman.yml. The remaining Akismet settings are left at default,
# Akismet spam detection
  akismet:
    enabled: true
Over at your Staticman API bridge set environment variables AKISMET_SITE and AKISMET_API_KEY.
AKISMET_SITE typical setting: https://yourdomain.com. This variable must match the site you identified in your Akismet/Wordpress account.
heroku config:add --app yourAppName "AKISMET_SITE=https://spinningnumbers.org"
heroku config:add --app yourAppName "AKISMET_API_KEY=yourAkismetAPIkey"
Testing Akismet TBD
“Yes this is spam” test: Submit a comment and enter this in the author field: akismet-guaranteed-spam@example.com
Troubleshooting
Here are the problems I’ve had. I’m happy to add your’s, especially if you have a solution.
status=200 success
status=200 is the status code for a successful transaction.
status=404 not found
status=404 is the status code for something not found.
Staticman URL not found,
https://spinningnumbers-staticman2.herokuapp.com/entry/willymcallister/willymcallister.github.io/master/comments
My URL was missing a /v2/, should have been,
https://spinningnumbers-staticman2.herokuapp.com/v2/entry/willymcallister/willymcallister.github.io/master/comments
Webhook URL not found.
2020-04-18T22:56:56.155851+00:00 heroku[router]: at=info method=POST path="/v1/webhook/" host=spinningnumbers-staticmandev2.herokuapp.com request_id=a8552a56-4182-415d-ba95-5cae432a7f07 fwd="140.82.115.241" dyno=web.1 connect=0ms service=6ms status=404 bytes=505 protocol=https
Solution: I had an extra / at the end of the URL: webhook/. Remove it.
Missing favicon.ico. Probably coming from a search engine.
heroku[router]: at=info method=GET path="/favicon.ico"host=spinningnumbers-staticmandev2.herokuapp.com request_id=d8001ccd-3466-4f20-ac80-ed2f7bb3db02 fwd="70.187.193.116" dyno=web.1 connect=0ms service=5ms status=404 bytes=504 protocol=https
Missing robots.txt. Probably coming from a search engine.
at=info method=GET path="/robots.txt" host=spinningnumbers-staticmandev2.herokuapp.com request_id=11149829-0e90-44a0-9ead-081dbd9152df fwd="54.36.148.81" dyno=web.1 connect=1ms service=10ms status=404 bytes=503 protocol=https
status=500 general error
General Staticman error code,
2020-03-23T12:51:07.577668+00:00 heroku[router]: at=info method=POST path="/v2/entry/willymcallister/willymcallister.github.io/master/comments" host=spinningnumbers-staticmandev2.herokuapp.com request_id=483c4f17-177d-4ae4-9979-f83221a7d40e fwd="5.188.210.39" dyno=web.1 connect=1ms service=452ms status=500 bytes=469 protocol=https
Checked the Chrome console and found an error message,
rawError: “Error: Error during decryption (probably incorrect key). Original error: Error: Incorrect data or key”
Make sure you encrypted the reCaptcha SECRET key, not the reCaptcha SITE key.
If you recently messed with the RSA key you have to redo all encryptions (3), and put them back in _config.yml and staticman.yml.
Something triggered this, resulting in a status=500,
2020-04-30T02:41:48.177549+00:00 heroku[router]: at=info method=POST path="/v2/entry/willymcallister/willymcallister.github.io/master/comments" host=spinningnumbers-staticmandev2.herokuapp.com request_id=00a84540-e2ce-4c27-9b6d-e76e802fce14 fwd="5.183.92.73" dyno=web.1 connect=1ms service=277ms status=500 bytes=524 protocol=https
Don’t know what this is.
reCaptcha ERROR for site owner: Invalid site key
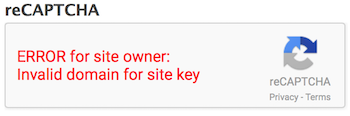
Your encrypted reCaptcha secret key in _config.yml was decrypted by Staticman and sent to reCaptcha. reCaptcha found it wanting. Make sure your reCaptcha secret key is encrypted with your latest RSA key. And while you are at it, make sure the reCaptcha secret key in staticman.yml matches the one in _config.yml.
Mail doesn’t arrive
No mail showed up when I did a curl command to one of my mailing lists.
Mailgun’s Log said: “Failed, No MX for mg.spinningnumbers.org”
I added two MX records to my domain at my domain host, justhost.com,
- Priority: 10, host record: mg, points to: mxa.mailgun.org
- Priority: 10, host record: mg, points to: mxb.mailgun.org
These new records are in addition to an MX record for,
- Priority: 0, host record: @, points to: mail.spinningnumbers.org
Credits
Appendix — MD5 questions
MD5 questions
Question: Why does Staticman return a md5-hashed subscriber email address to Github in the comment file? What is it ever used for? Answer: If you use Gravatar you can show visitor’s avatar with those hashed email. Gravatar uses md5-hashed email as an identifier. Here is my gravitar with a size s= specification.
Default image is https%3A%2F%2Fspinningnumbers.org%2Fi%2Fsn_logo300.png.
https://www.gravatar.com/avatar/00000000000000000000000000000000?s=200&r=pg&d=https%3A%2F%2Fspinningnumbers.org%2Fi%2Fsn_logo300.png
Show a mystery person d=mp,
https://www.gravatar.com/avatar/00000000000000000000000000000000?s=100&r=pg&d=mp
Question/Wish: I wish I could replicate the mailing list MD5 function in a terminal window, something like,
md5 -s "willymcallister-willymcallister.github.io/master-https://spinningnumbers.org/a/charge.html"
This didn’t work. The output did not match the mailing list alias for my Charge article. I suspect the repository name is wrong. If this can be made to work then you can derive the mailing list name stored at MailGun. That would be useful for things like finding and removing recipients.
The MD5 hash concatenates three fields, separated by hyphens,
- username (willymcallister)
- repository (not sure what this is)
- entryID (article URL)
The is the Staticman code that performs the MD5 hash in SubscriptionsManager.js,
SubscriptionsManager.prototype._getListAddress = function (entryId) {
  const compoundId = md5(`${this.parameters.username}-${this.parameters.repository}-${entryId}`)

  return `${compoundId}@${this.mailAgent.domain}`
}
The entryID comes from the value of options[parent] in comment_form.html. options[parent] can be whatever—–post title, slug or made up entry id. options[parent] is only used to create mailing lists. In my case the parent is the page URL and the subscription is to any/all comments for one post.
Related Staticman issue: #127
Appendix — Exercising MailGun
Exercising MailGun
You can exercise the features of your MailGun account from a terminal window using curl (client URL).
Create a mailing list
General form,
curl -s --user 'api:YOUR_API_KEY' \
   https://api.mailgun.net/v3/lists \
   -F address='LIST@YOUR_DOMAIN_NAME' \
   -F description='Mailgun developers list'
My form,
curl -s --user 'api:key-willysprivateAPIkey1234asdf1234a' \
   https://api.mailgun.net/v3/lists \
   -F address='Spinningnumbers@mg.spinningnumbers.org' \
   -F description='Mailgun test list'
Add a member to a mailing list
General form,
curl -s --user 'api:YOUR_API_KEY' \
    https://api.mailgun.net/v3/lists/LIST@YOUR_DOMAIN_NAME/members \
    -F subscribed=True \
    -F address='bar@example.com' \
    -F name='Bob Bar' \
    -F description='Developer' \
    -F vars='{"age": 26}'
My form,
curl -s --user 'api:key-willysprivateAPIkey1234asdf1234a' \
    https://api.mailgun.net/v3/lists/spinningnumbers@mg.spinningnumbers.org/members \
    -F subscribed=True \
    -F address='willymcallister1@gmail.com' \
    -F name='Willy McAllister' \
    -F description='Developer'
Update an existing member
curl -s --user 'api:YOUR_API_KEY' -X PUT \
    https://api.mailgun.net/v3/lists/LIST@YOUR_DOMAIN_NAME/members/bar@example.com \
    -F subscribed=False \
    -F name='Foo Bar'
Remove a member
curl -s --user 'api:YOUR_API_KEY' -X DELETE \
    https://api.mailgun.net/v3/lists/LIST@YOUR_DOMAIN_NAME/members/bar@example.com
Add multiple people to a mailing list
curl -s --user 'api:YOUR_API_KEY' \
   https://api.mailgun.net/v3/lists/LIST@YOUR_DOMAIN_NAME/members.json \
   -F upsert=true \
   -F members='[{"address": "Alice <alice@example.com>", "vars": {"age": 26}},{"name": "Bob", "address": "bob@example.com", "vars": {"age": 34}}]'
List members of a mailing list
General form,
curl -s --user 'api:YOUR_API_KEY' -G \
    https://api.mailgun.net/v3/lists/LIST@YOUR_DOMAIN_NAME/members/pages
My form,
curl -s --user 'api:key-willysprivateAPIkey1234asdf1234a' \
    https://api.mailgun.net/v3/lists/spinningnumbers@mg.spinningnumbers.org/members/pages
Retrieve a list of mailing lists
curl -s --user 'api:YOUR_API_KEY' -G \
    https://api.mailgun.net/v3/lists/pages
curl -s --user 'api:key-willysprivateAPIkey1234asdf1234a' \
    https://api.mailgun.net/v3/lists/pages
I use this to search mailings lists by date of creation.
Remove a mailing list
curl -s --user 'api:YOUR_API_KEY' -X DELETE \
    https://api.mailgun.net/v3/lists/LIST@YOUR_DOMAIN_NAME
Playground
If you are setting up your own system, feel free to practice here. Add comments to this page to see how it works. It takes 5-10 seconds for Staticman to awaken at Heroku and respond with an Accepted! message. This site is moderated, so I have to approve your comment before it appears.
Appendix — Fighting spam
An idea from TerminalAddict at Jekyll Talk… (still need to understand how this is called),
Specifically, changing the html to button type=“button”, then dynamically changing to type=“submit” takes care of 99.999%. This JS function seems to be the bizzo!
var verifyCaptcha = function(response) {
    if(response.length == 0) {
    } else {
        var _el=$('#comment-form-submit');
        _el.removeAttr("disabled");
        _el.addClass('button-primary dark-blue-bg');
        _el.attr('aria-disabled', 'false');
        _el.attr('type', 'submit');
    }
};
Questions
Hey! Thanks for awesome guide! Want to ask what was the name of your bot account -“willymcallisterbot” or “willymcallister”. In “Create a GitHub bot account” section you named it willymcallisterbot. But then in exapmles i can find only willymcallister. What was the real name?
Yuri - There are two accounts, ‘willymcallister’ is my main github presence, with the web site contents and circuit simulator. The ‘bot account is separate. It has no content, it represents a github identity used by my Staticman instance running at Heroku. Staticman at Heroku receives the comment submission from you, formats it, and comes back into github using the ‘bot’s identity/password. The ‘bot is an approved contributor to the regular willymcallister github account. The ‘bot submits the comment file as a Pull Request to the Spinning Numbers repository (willymcallister.github.io). When I accept the PR it triggers a site rebuild and the comment magically appears on the otherwise static site.
I’m still having problems adding staticman but thanks for the break down
Thank you for writing this! It helped me get my Staticman instance stood up.
THanks for the detailed instructions. staticman docs left me confused till now.
Does this work without Jekyll? I have a custom generator like Jekyll that I made with Jinja2 templates, so I assume it still would.
I don’t think there’s anything specific to Jekyll in Staticman. All the triggering logic is in the comment form submission. The response is sent to your comments folder with an assumed structure.
Hello, just testing to see where this redirects
Thanks for such a great guide! I followed your instructions and everything worked including Akismet.
That’s great. Glad my notes helped. I haven’t been able to get Akismet working, yet. It would be great if you could post your URL here, or send me a PM at willy@spinningnumbers.org
I took most of the scripts from Travis Downs
I run my own instance of Staticman at Heroku and I added Akismet and Mailgun following your guide.
Here is my website: AverageLinuxUser.com
This was incredibly helpful. The Staticman docs / pre-built tools seem to be a mix of outdated and broken. Thank you!
Testing a web link in a comment.
Circuit Sandbox
test again
test
Hi, I just wanted to say thanks for this guide! It’s by far the most comprehensive of the ones I’ve found and thanks to it I now have Staticman set up and working great.
Do you know if staticman still works for free mailgun account? I have just a sandbox domain and it works when I test with your curl commands, but doesn’t when I submit a new comment on my github page. I literally don’t know what to do anymore. :-(
Gabriel - I am using a free MailGun account. (It is not actually free any more, but the charges are tiny, like $0.80/1,000 messages, for small amounts of mail.) The sandbox user has significant restrictions. You can only mail to 5 ‘authorized recipients’ that you need to set up. Also, I think the sandbox is not capable of receiving mail from outside. When you send a message to MailGun are you observing the log messages at MailGun? The other place to get debug info is within your browser. Watch what happens when the comment_form is submitted. You dig this data out of the developer tools.
test
test
testing the response to see If the email notification will be sent
Test comment
dsf
Test comment